Construction Light A WordPress Theme for Construction site.
- created: 7/03/2019
- by: Sparkle Themes
Introduction
Construction Light is a user-friendly and feature-rich, intuitive and creative, powerful and impressive engaging and dynamic, tech-savvy and good looking, rapidly responsive construction WordPress Theme. Construction Light is one of the most accessible themes which can easily accommodate all type of users with no coding skills to advanced developers.
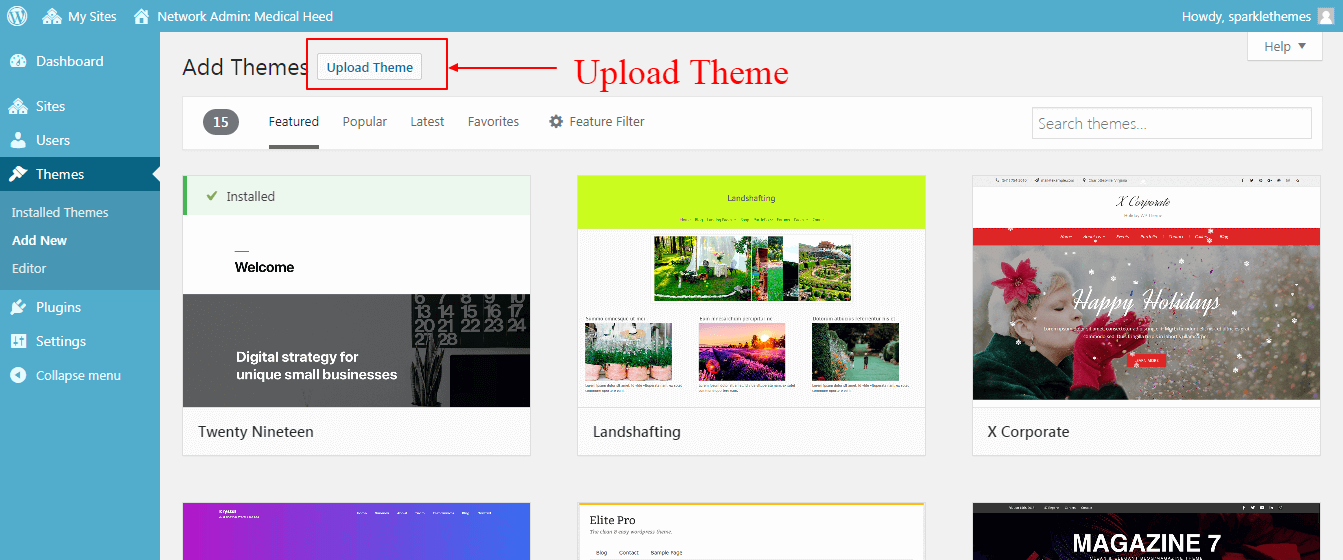
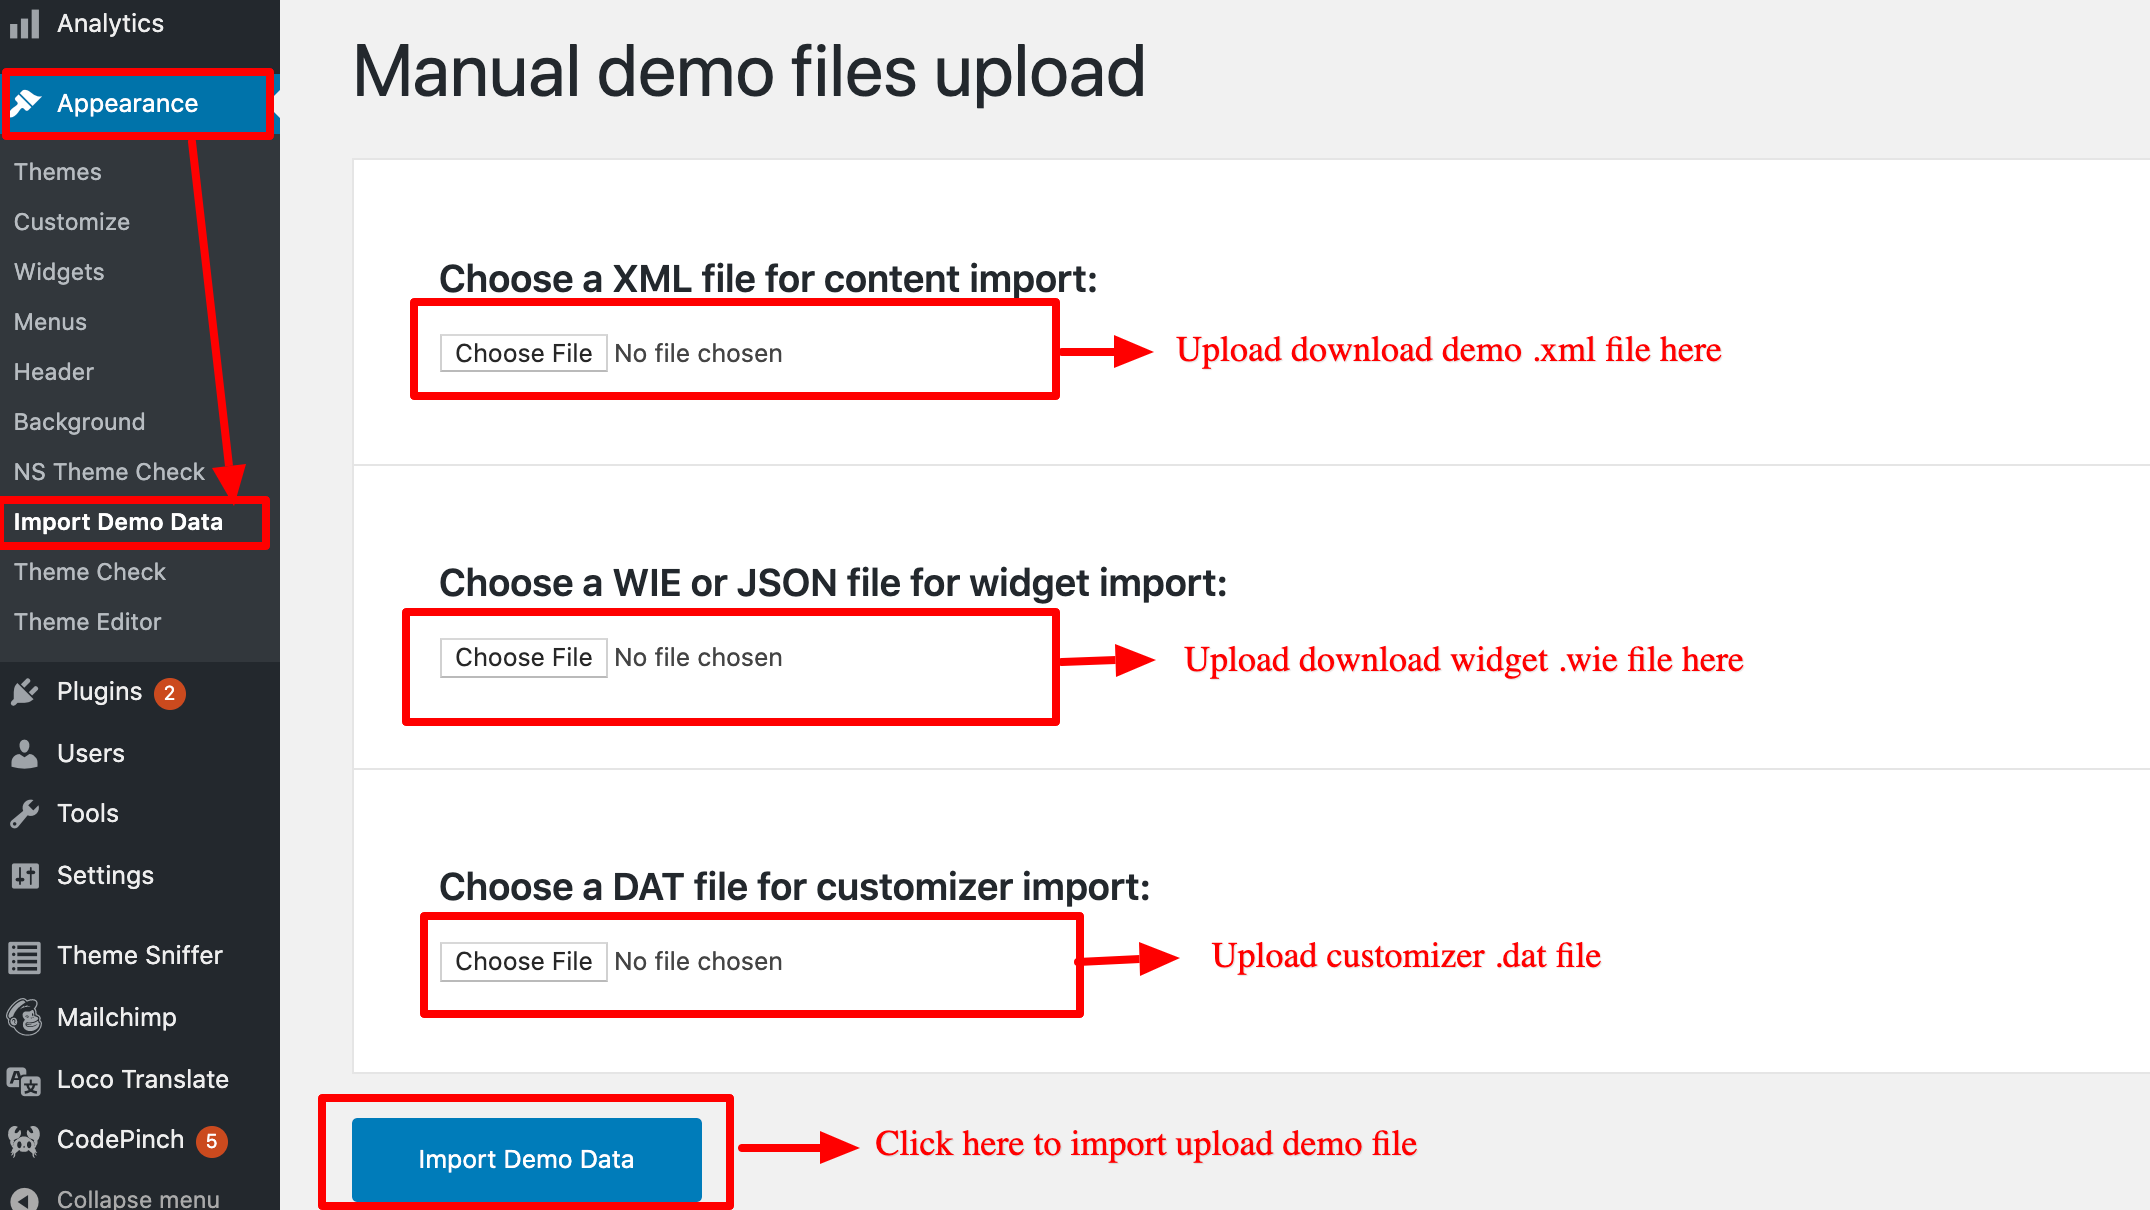
How to install theme demo data manually
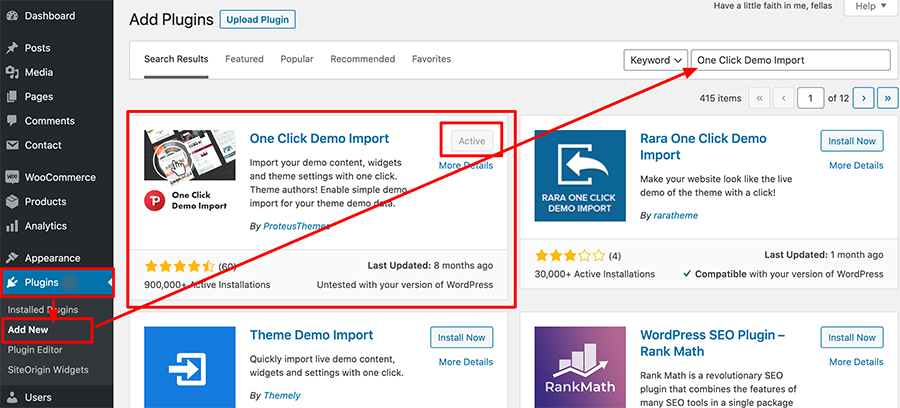
- Log into your WordPress site and opens the Administration Panel
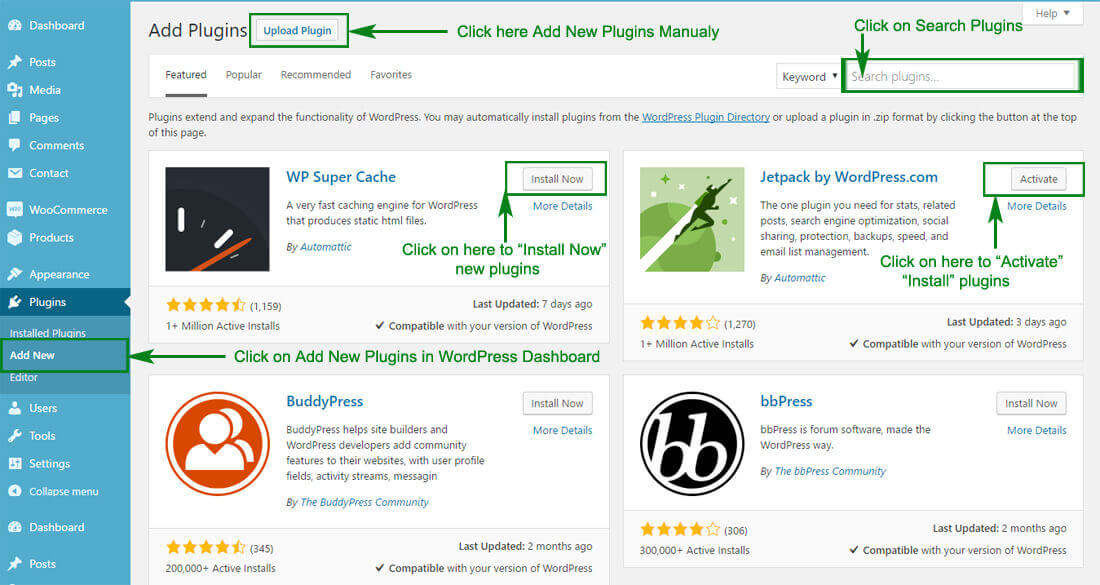
- Click Navigate to Plugins >> Add New
- Search for the name of the plugin "One Click Demo Import"
- Click on “Install Now” and active also see more detail below screenshot.
and
Why Construction Light?
Construction Light is one of the most accessible themes which can easily accommodate all type of users with no coding skills to advanced developers. Construction Light includes excellent features of one click demo data import, customizer based theme options, page builder-friendly design, page & post layout options. This free Construction WordPress Theme is fully responsive, cross-browser compatible, translation ready, SEO friendly and social media integration also Construction Light supports Jetpack, Contact Form 7 and some social sharing plugins.