Fitness Park ProA WordPress Theme for Fitness Club site.
Introduction
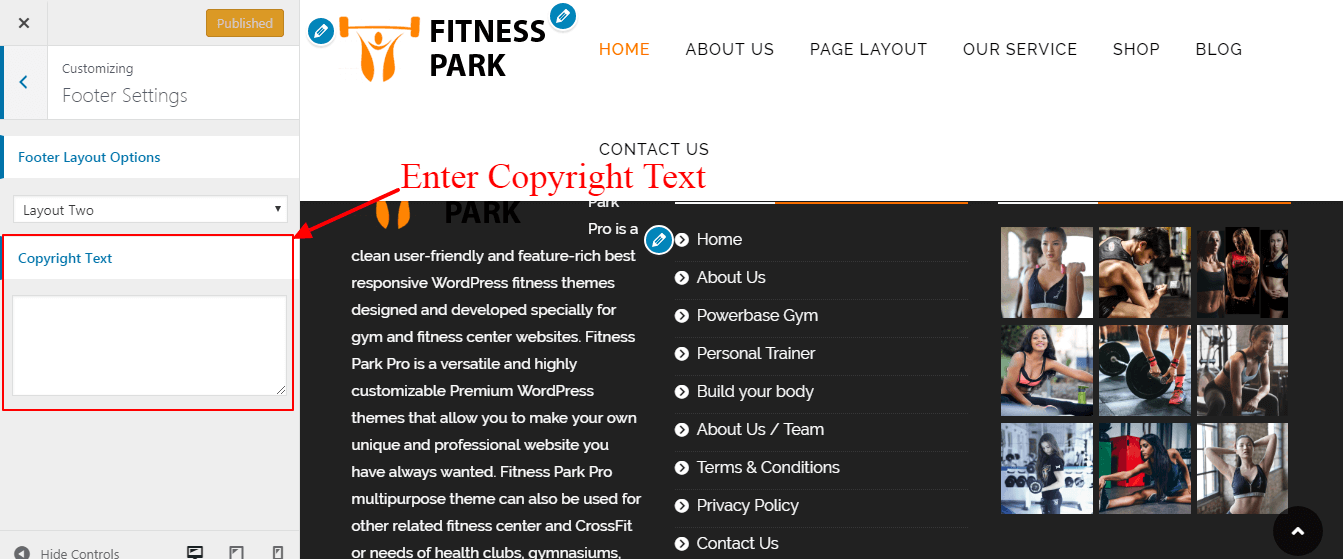
Fitness Park Pro is a clean user-friendly and feature-rich best responsive WordPress fitness themes designed and developed specially for gym and fitness center websites. Fitness Park Pro is a versatile and highly customizable Premium WordPress themes that allow you to make your own unique and professional website you have always wanted. Fitness Park Pro multipurpose theme can also be used for other related fitness center and CrossFit or needs of health clubs, gymnasiums, spas, and wellness centers any other sport and health-related website. Fitness Park Pro is one of the most accessible Fitness WordPress themes which can easily accommodate all type of users with no coding skills to advanced or normal web developers.
Why Fitness Park Pro?
Fitness Park Pro is a clean user-friendly and feature-rich best responsive WordPress fitness themes designed and developed specially for gym and fitness center websites. Fitness Park Pro is a versatile and highly customizable Premium WordPress themes that allow you to make your own unique and professional website you have always wanted. Fitness Park Pro multipurpose theme can also be used for other related fitness center and CrossFit or needs of health clubs, gymnasiums, spas, and wellness centers any other sport and health-related website. Fitness Park Pro is one of the most accessible Fitness WordPress themes which can easily accommodate all type of users with no coding skills to advanced or normal web developers. Fitness Park Pro includes excellent features for gymnasiums professionals and practices of all type of fitness business, themes have included more advanced features like one-click demo data import, different header layout, webpage layout, preloader, advanced theme color, customizer based theme options, page builder-friendly design, individual page & post layout options.
How to install the theme?
There are two methods to install theme. You may either upload the zipped theme file using the WordPress theme installer (Recommended), or you can upload the unzipped theme folder via FTP (Advanced).
-
Unzip “fitness-park-pro.zip” file on your computer.
-
Login using FTP client to access your host web server.
-
Locate the wp-content folder in your WordPress install files.
-
Upload the un-zipped Fitness Park Pro folder into the: wp-content/themes folder.
-
Log in to the WordPress Administration Panel.
-
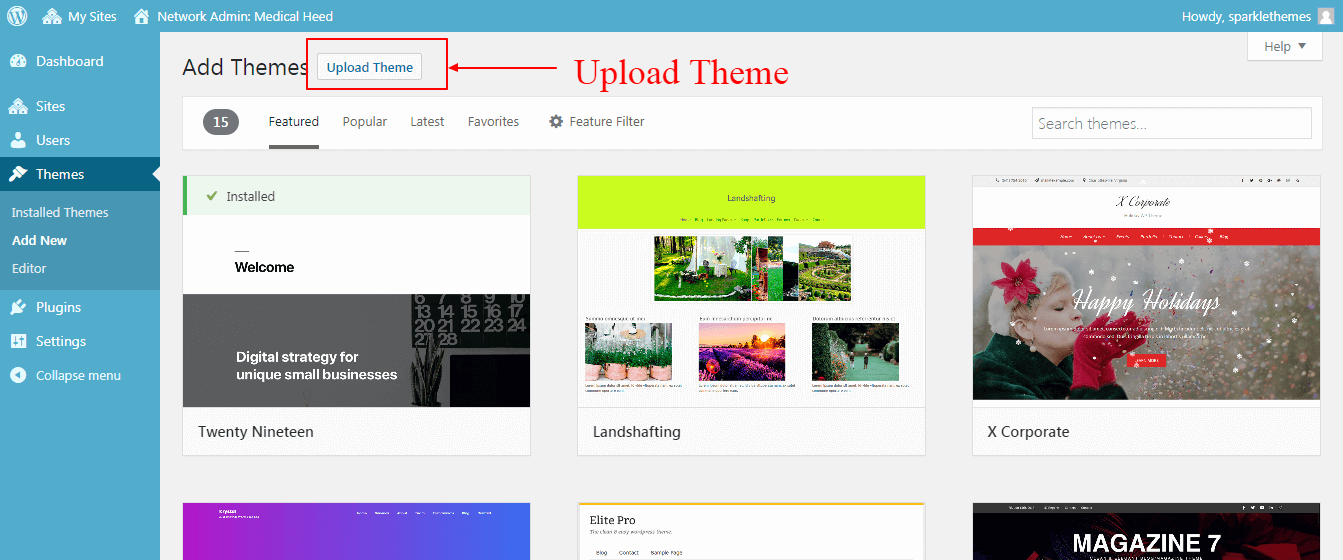
Go to Appearance > Themes in the WordPress menu
-
Hover over the theme thumbnail and click the Activate button.
Plugin Installation
To install a plugin in your WordPress admin panel and follow the following steps.
Plugin Installing Method
-
Log into your WordPress site and opens the Administration Panel.
-
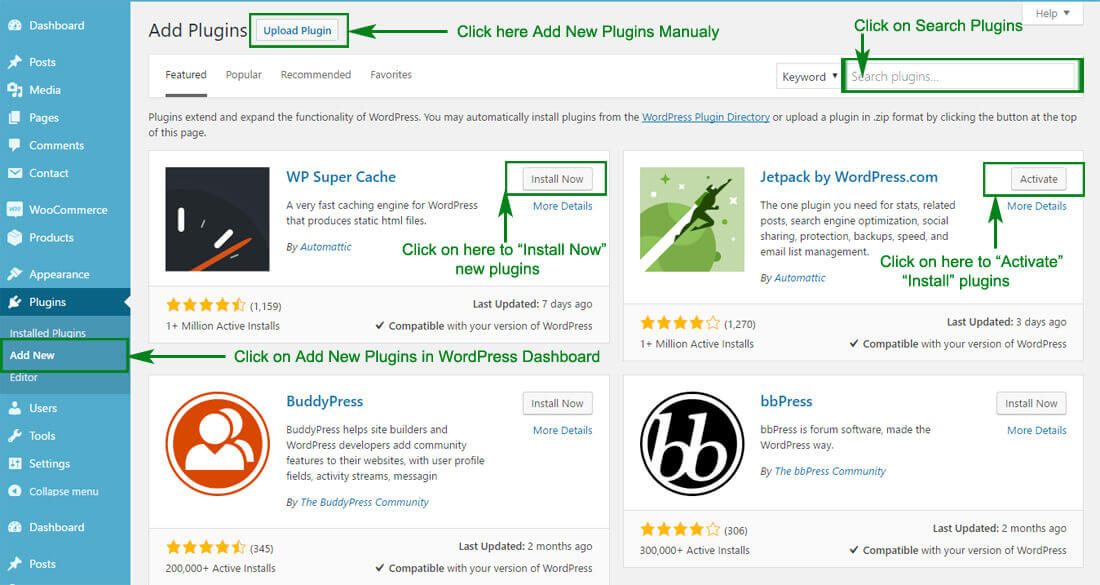
Click Navigate to Plugins > Add New in the WordPress Dashboard.
-
Search for the name of the plugin you wish to install which will return a list of potential plugins.
-
Click Details to read more about a plugin.
-
Click “Install Now” if you wish to install the plugin.
-
It may ask if you are sure, and you may proceed. The installation will commence once you confirm to proceed.
-
After the plugin is downloaded. Go to Plugins>Installed Plugins. Click “Activate Plugin” to make it available for use.
Recommended Plugins : We recommend you to download the following plugins when necessary:
-
Jetpack by WordPress.com, by: Automattic (The plugin provides a variety of complementary features for your Theme.)
-
Regenerate Thumnails by Alex Mills (Viper007Bond) (If you have existing content, this will help you update your image thumbnails sizes.)
-
Contact Form 7 by Takayuki Miyoshi (Contact Form 7 can manage multiple contact forms, plus you can customize the form and the mail contents flexibly with simple markup. )
Manage HomePage/FrontPage
-
Log into your WordPress site and opens the Administration Panel.
-
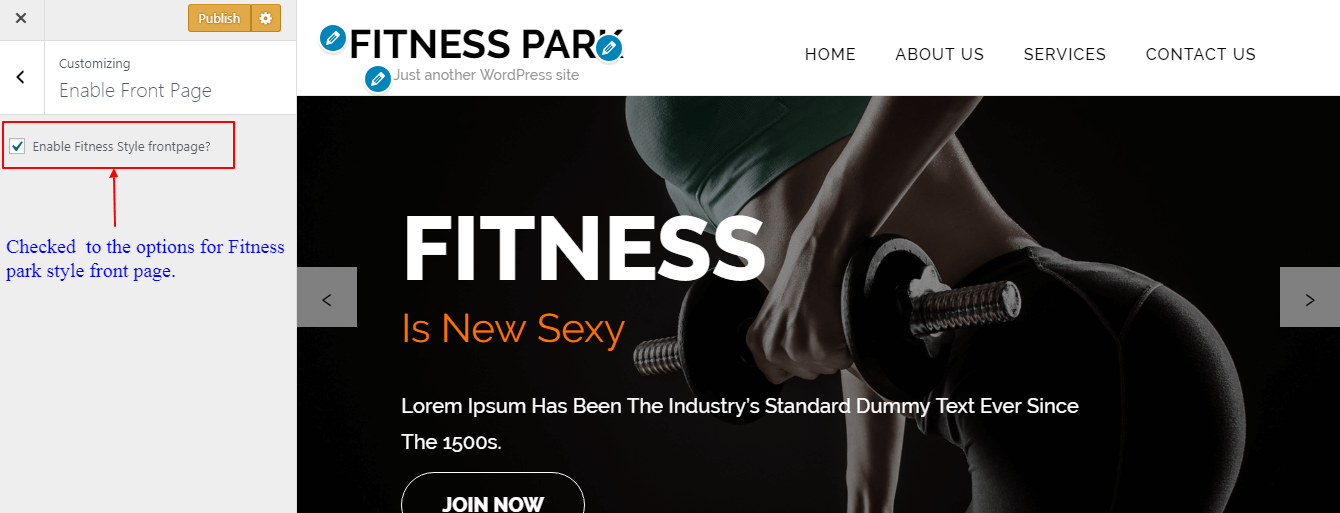
Go to Dashboard > Appearance > Customize
-
Enable Front Page >>Then Below is checked "Enable Fitness Park Style frontpage?" Checked that options.
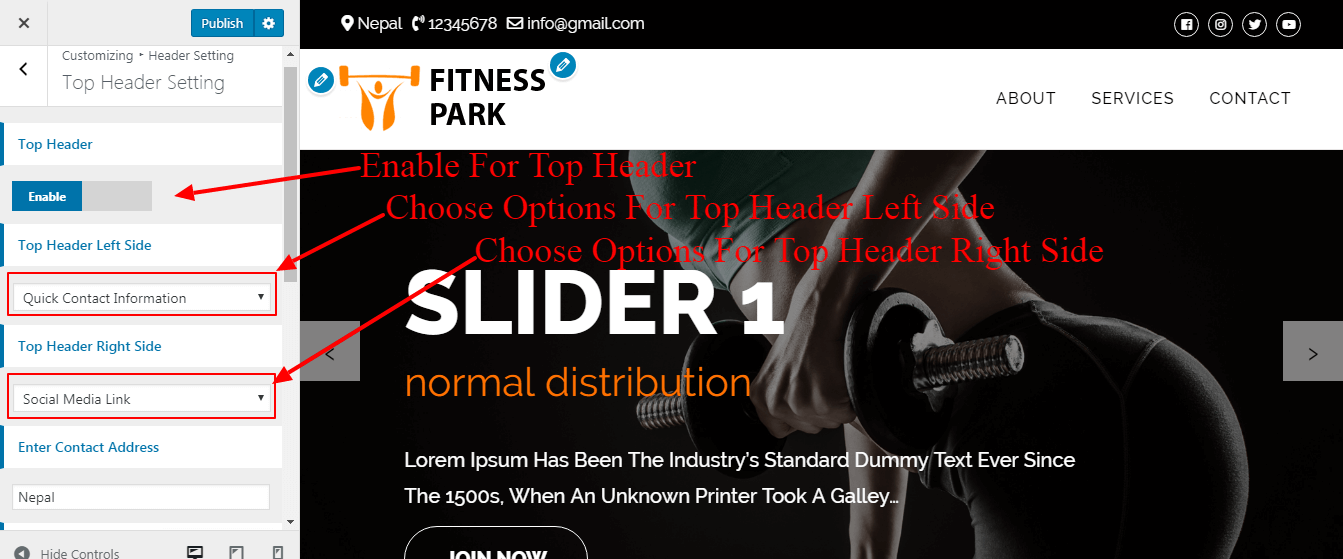
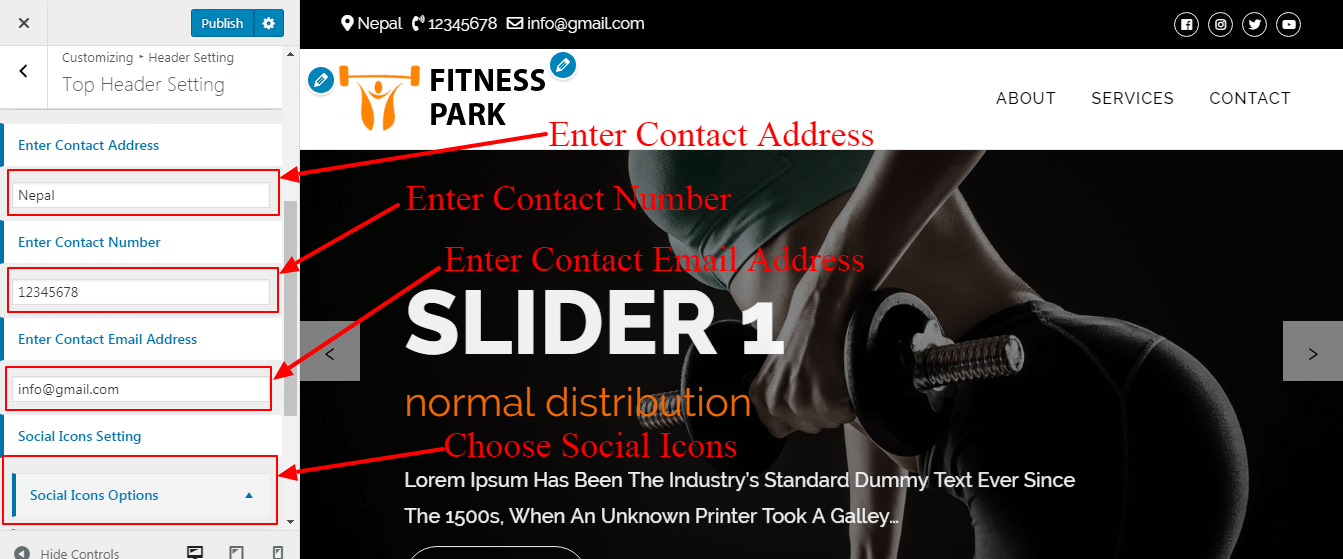
General Setting
-
Go to Appearance> Customize > General Settings > Site Identity
-
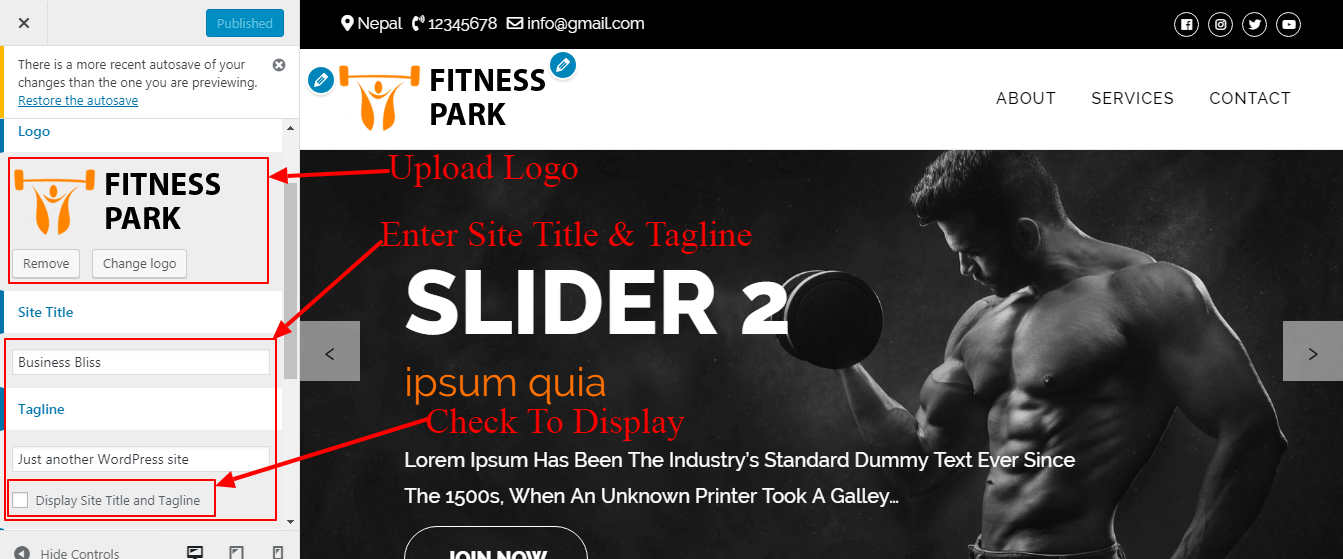
Click Select logo by clicking Select Logo.
-
Upload and select the desired image.
-
Enter the Site Title and Tagline
-
Check Display Header Text for the Site title and Tagline to appear on your homepage.
-
Click Select Image under Site Icon
-
Upload and select the desired image. (The Site Icon/ favicon is used as a browser and app icon for your site. The recommended Site Icon size is 512*512 pixels.)
- Publish.
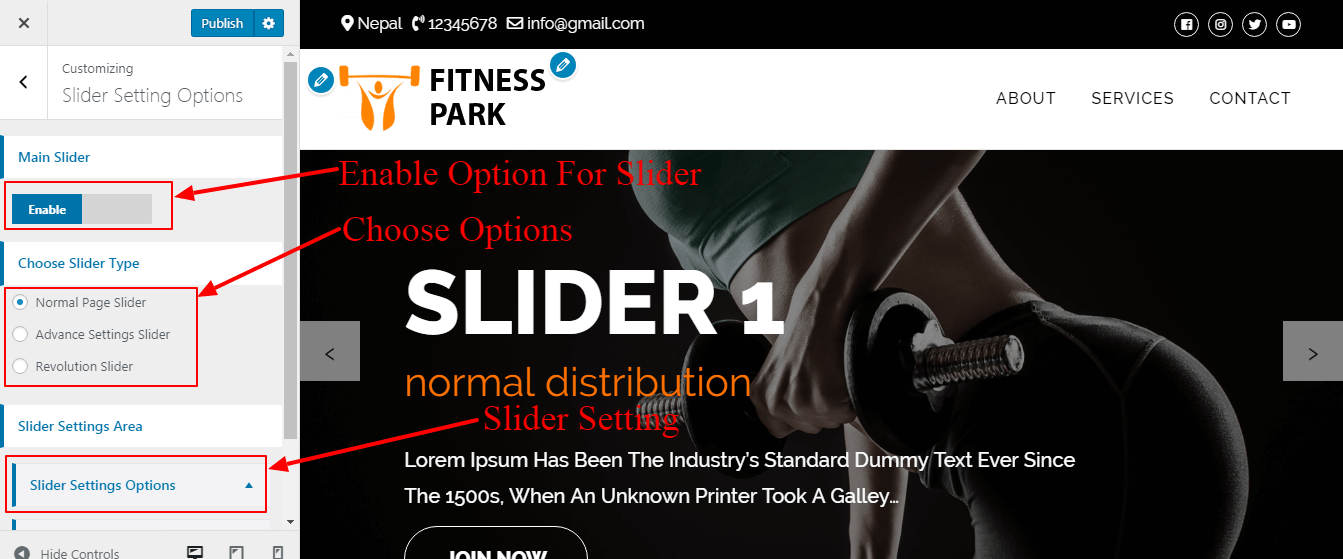
Main Banner Slider Setting
-
Log into your WordPress site and opens the Administration Panel.
-
Create Page with Slider Title, Description & Featured Image.
-
Go to Dashboard > Appearance > Customize
-
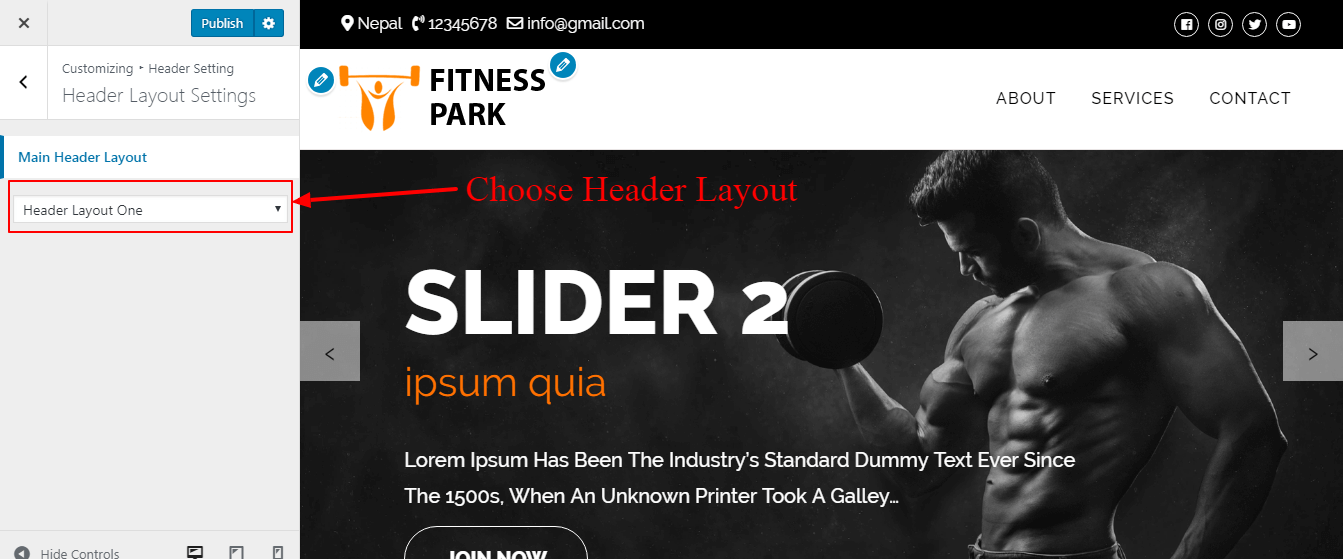
Open > Banner Slider
-
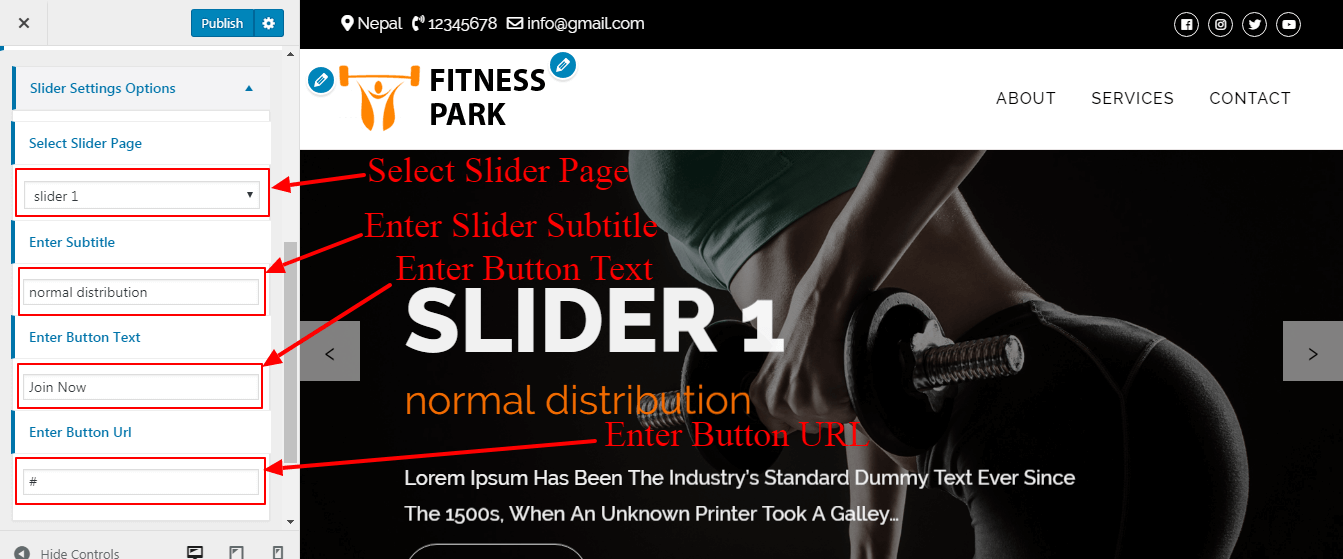
Select Featured Page.
-
Enter Subtitle.
-
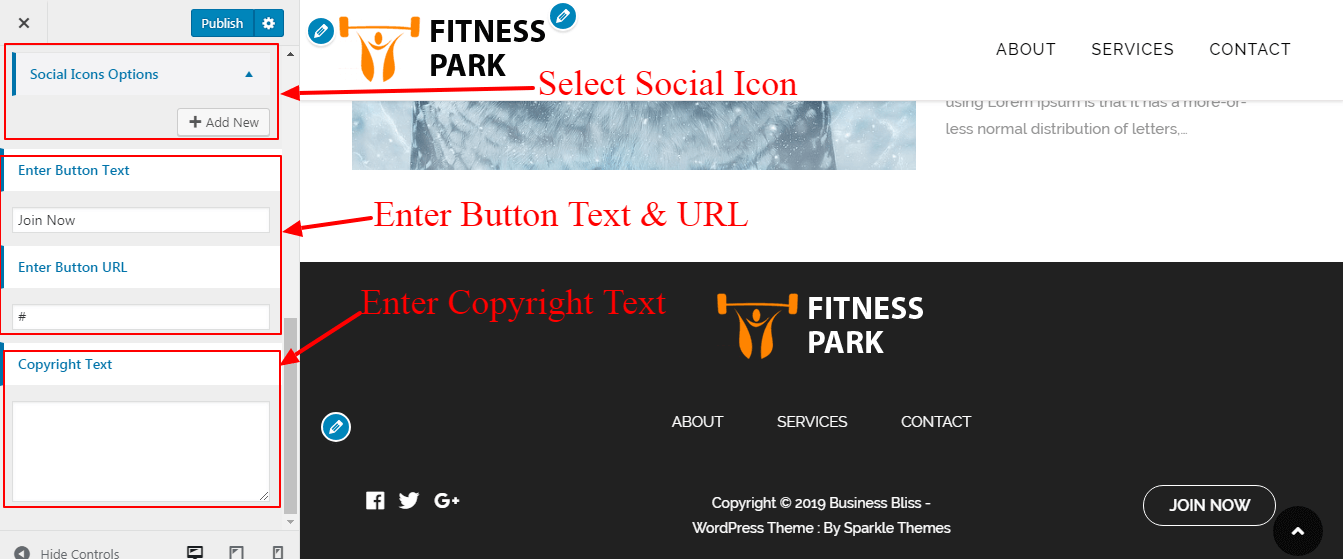
Enter Button Text.
-
Enter Button URL.
-
Publish.
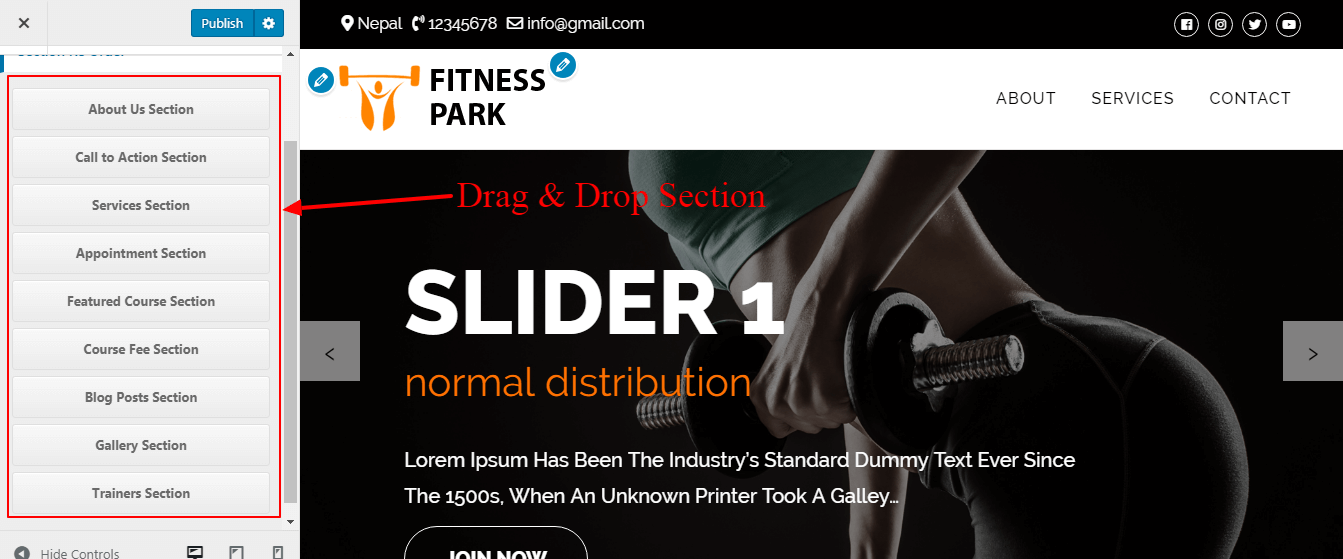
Frontpage Section Area
-
Log into your WordPress site and opens the Administration Panel.
-
Go to Dashboard > Appearance > Customize
-
Open > Home/Frontpage Setting
-
Home/Frontpage Setting > Section Re order.
-
Drag And Drop Section As Per Your Need.
-
Publish.
-
Log into your WordPress site and opens the Administration Panel.
-
Create Page with Title and Description.
-
Go to Dashboard > Appearance > Customize
-
Open > Home/Frontpage Setting
-
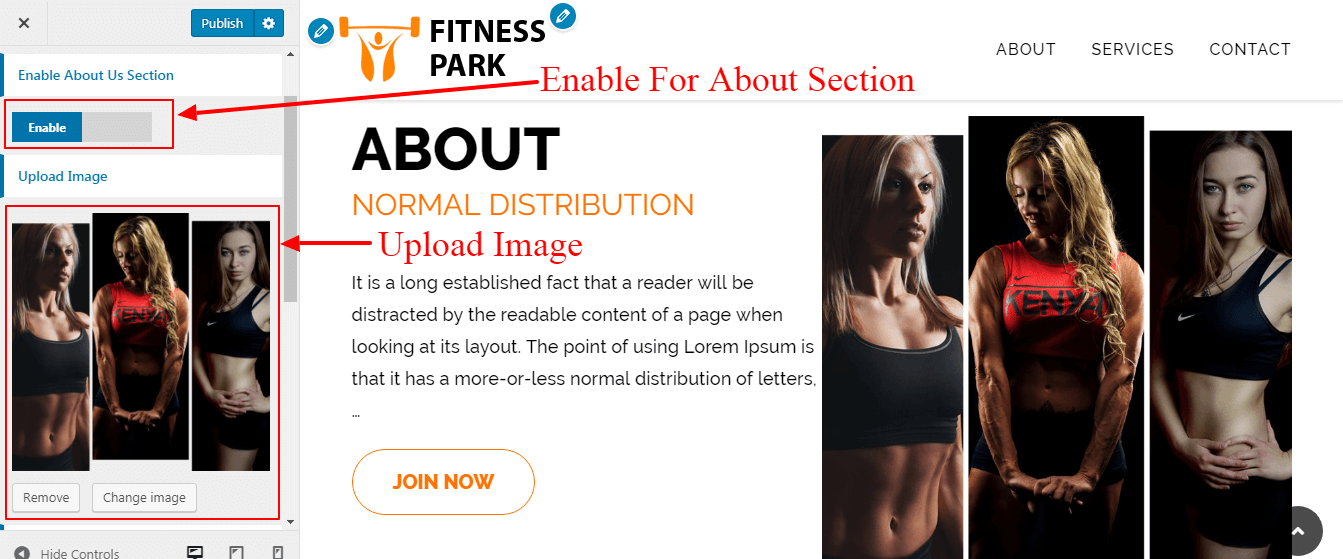
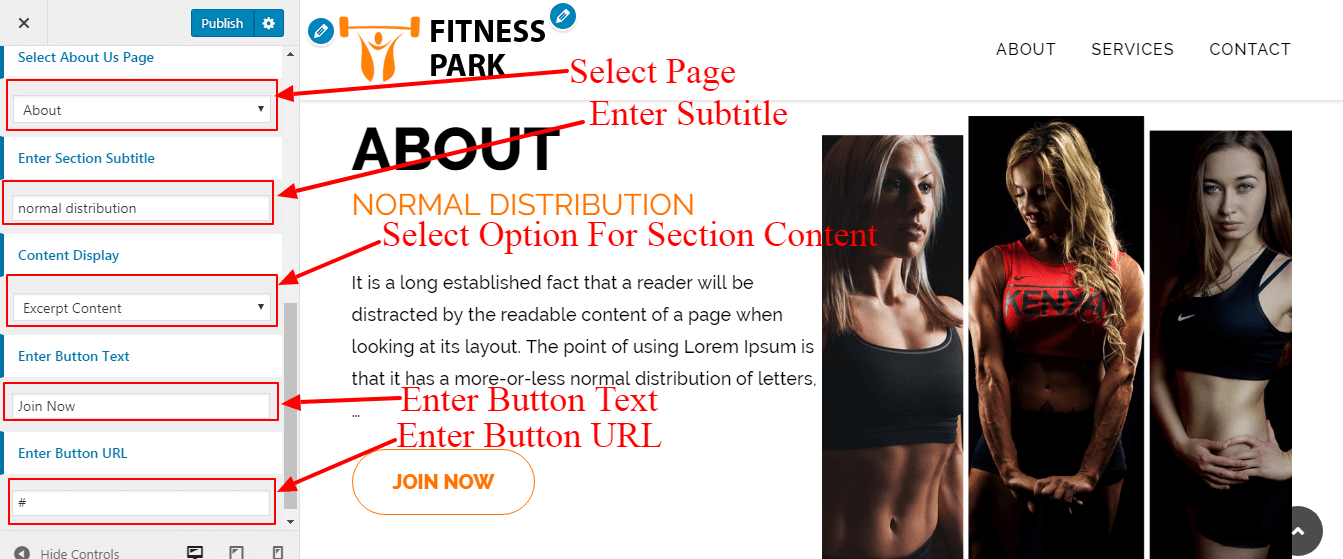
Home/Frontpage Setting > About Us Section
-
Upload Image. (Note: If you don't upload image then page image will be displayed.)
-
Select Featured Page.
-
Enter Section Subtitle.
-
Slect Option To Display Section Content.
-
Enter Button Text.
-
Enter Button URL.
-
Publish.
-
Log into your WordPress site and opens the Administration Panel.
-
Go to Dashboard > Appearance > Customize
-
Open > Frontpage Settings
-
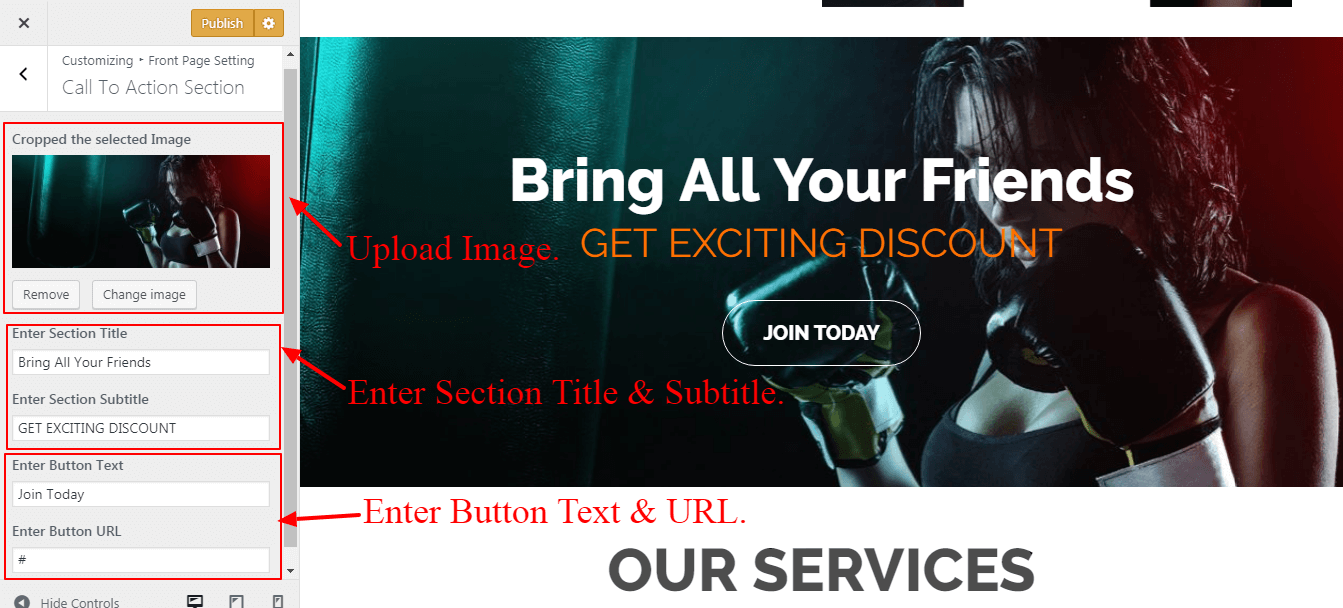
Frontpage Settings > Call To Action Section.
-
Upload Image.
-
Enter Section Title.
-
Enter Section Subtitle.
-
Enter Button Text.
-
Enter Button URL.
-
Publish.

-
Log into your WordPress site and opens the Administration Panel.
-
Create page with Title and Description.
-
Go to Dashboard > Appearance > Customize
-
Open > Frontpage Settings
-
Frontpage Settings > Service Section.
-
Enter Section Title.
-
Enter Section Subtitle.
-
Select Featured Page.
-
Select Icon.
-
Publish.
-
Log into your WordPress site and opens the Administration Panel.
-
Install Contact Form 7 Plugin and copy the shortcode.
-
Go to Dashboard > Appearance > Customize
-
Open > Home/Frontpage Settings
-
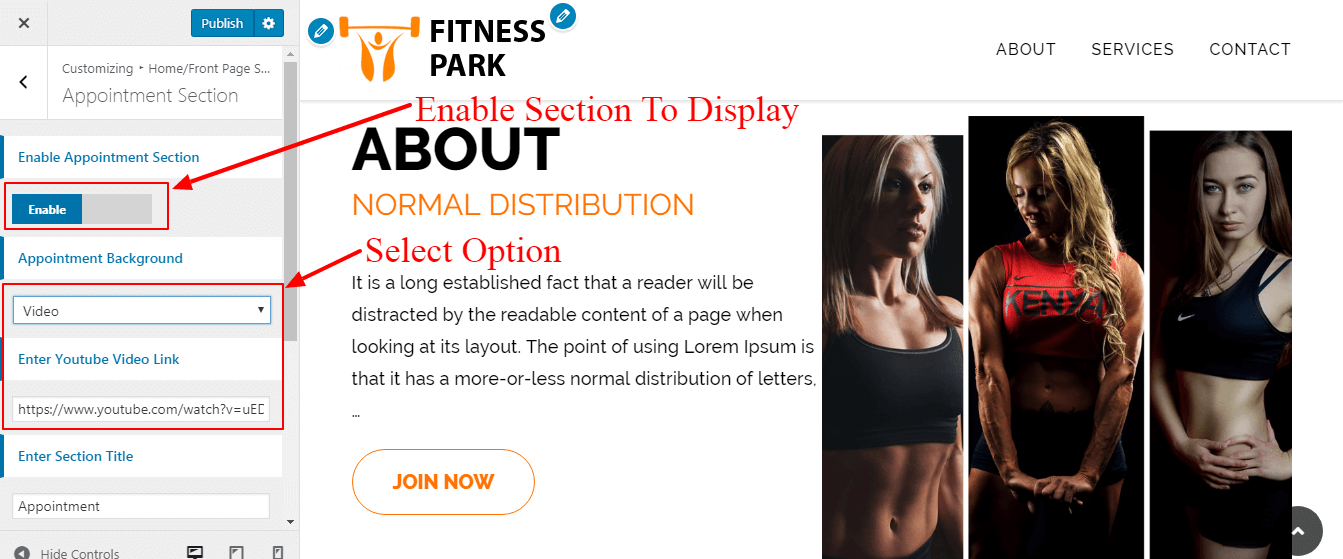
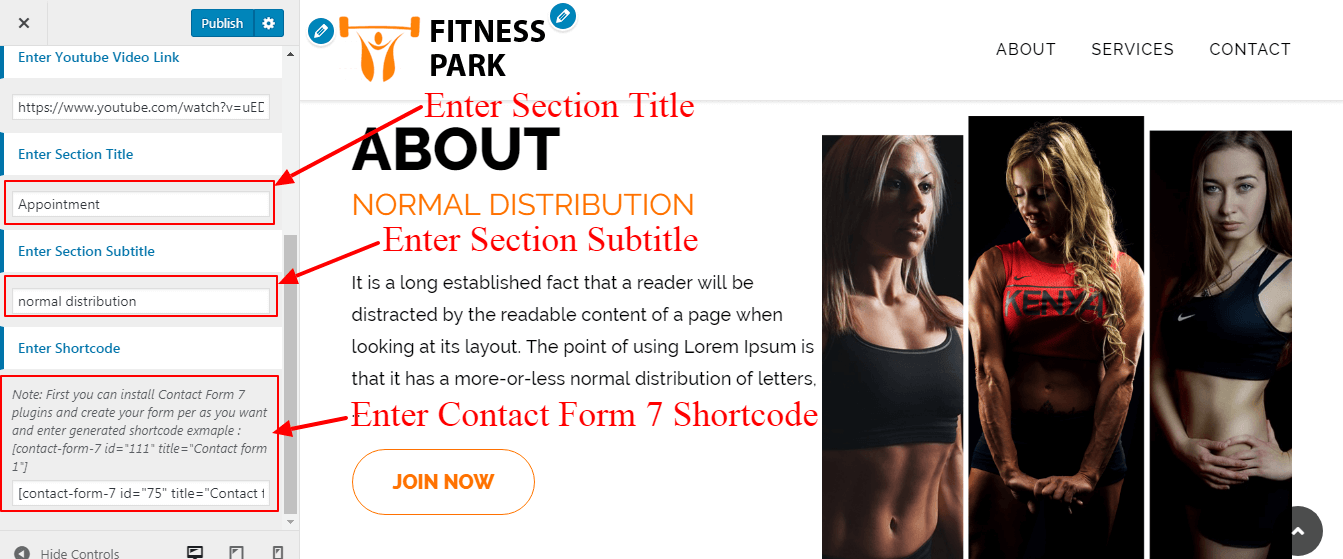
Home/Frontpage settings > Appointment Section.
-
Enabel Option To Display.
-
Select Option For Appointment Background (Video/Image).
-
For Option Video > Enter Video Link
-
For Option Image > Upload Image
-
Enter Contact Form Title.
-
Enter Contact Form Subtitle.
-
Paste copied Shortcode.
-
Publish.
-
Log into your WordPress site and opens the Administration Panel.
-
Create Page With Title & Featured Image.
-
Go to Dashboard > Appearance > Customize
-
Open > Home/Frontpage Settings
-
Home/Frontpage settings > Featured Course Section.
-
Enable Option To Display.
-
Enter Section Title.
-
Enter Section Subtitle.
-
Select Featured Course Page.
-
Enter Course Date.
-
Publish.
-
Log into your WordPress site and opens the Administration Panel.
-
Go to Dashboard > Appearance > Customize
-
Open > Home/Frontpage Settings
-
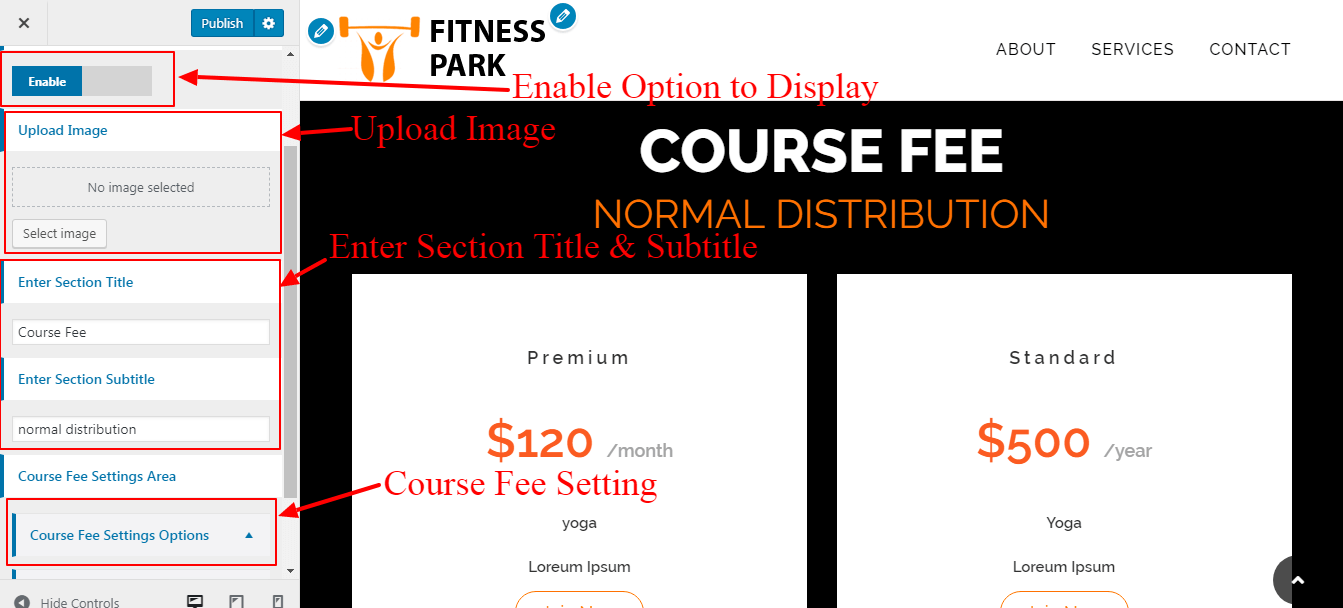
Home/Frontpage settings > Course Package Fee Section.
-
Enable Option To Display.
-
Upload Background Image.
-
Enter Section Title.
-
Enter Section Subtitle.
-
Enter Courese Fee Type.
-
Enter Course Fee.
-
Enter Course Duration.
-
Enter Course Name.
-
Enter Button Text.
-
Enter Button URL.
-
Publish.
-
Log into your WordPress site and opens the Administration Panel.
-
Create Posts with Title, Description, Featured Image and Create Category.
-
Go to Dashboard > Appearance > Customize
-
Open > Home/Frontpage Settings
-
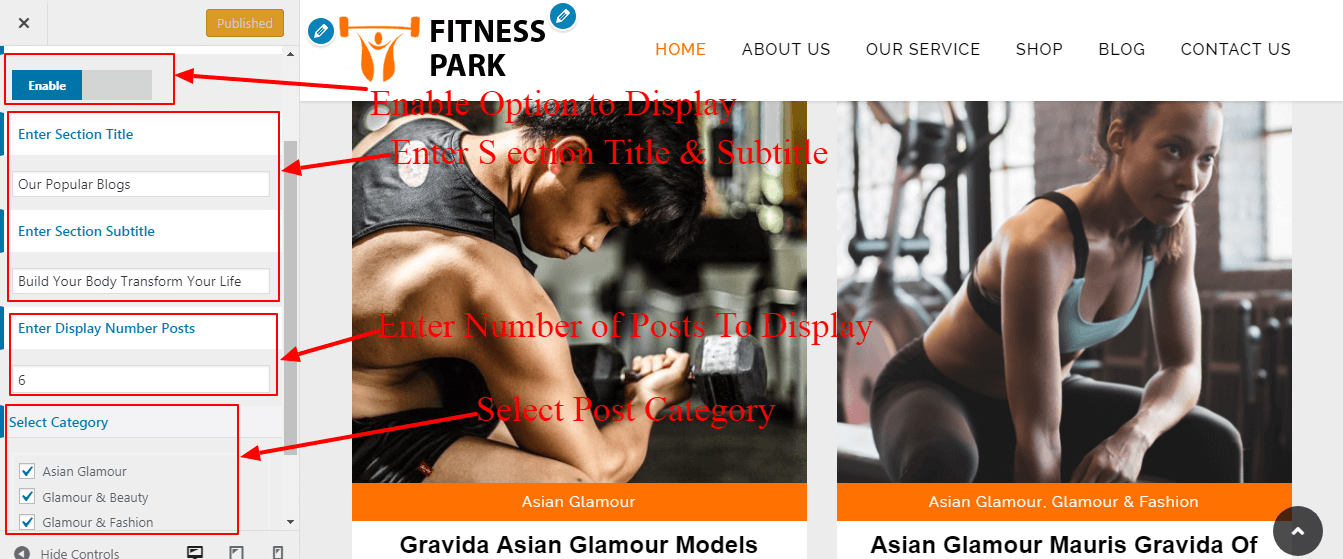
Home/Frontpage Settings > Blog Posts Section.
-
Enter Section Title.
-
Enter Section Subtitle.
-
Enter Number Of Posts To Display.
-
Check Category To Display Blog Posts.
-
Publish.
-
Log into your WordPress site and opens the Administration Panel.
-
Go to Dashboard > Appearance > Customize
-
Open > Home/Frontpage Setting.
-
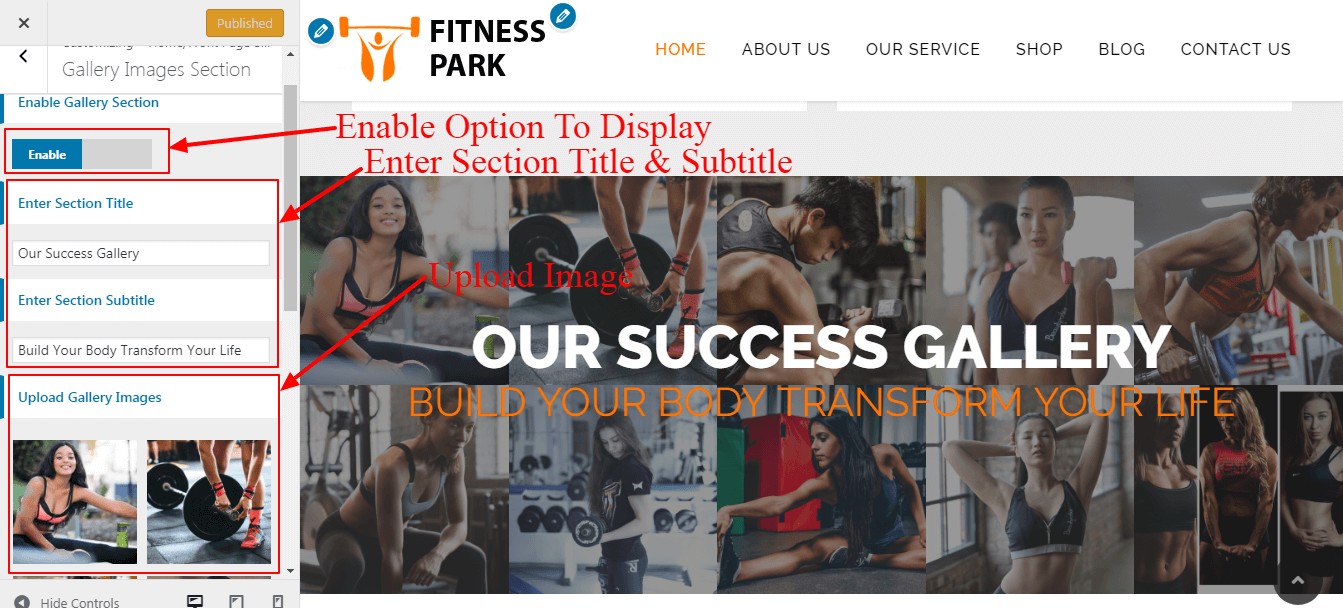
Home/Frontpage Setting > Gallery Section.
-
Enter Section Title.
-
Enter Section Subtitle.
-
Upload Images.
-
Publish.
-
Log into your WordPress site and opens the Administration Panel.
-
Create Page with Title, Description and Featured Image.
-
Go to Dashboard > Appearance > Customize
-
Open > Frontpage Setting
-
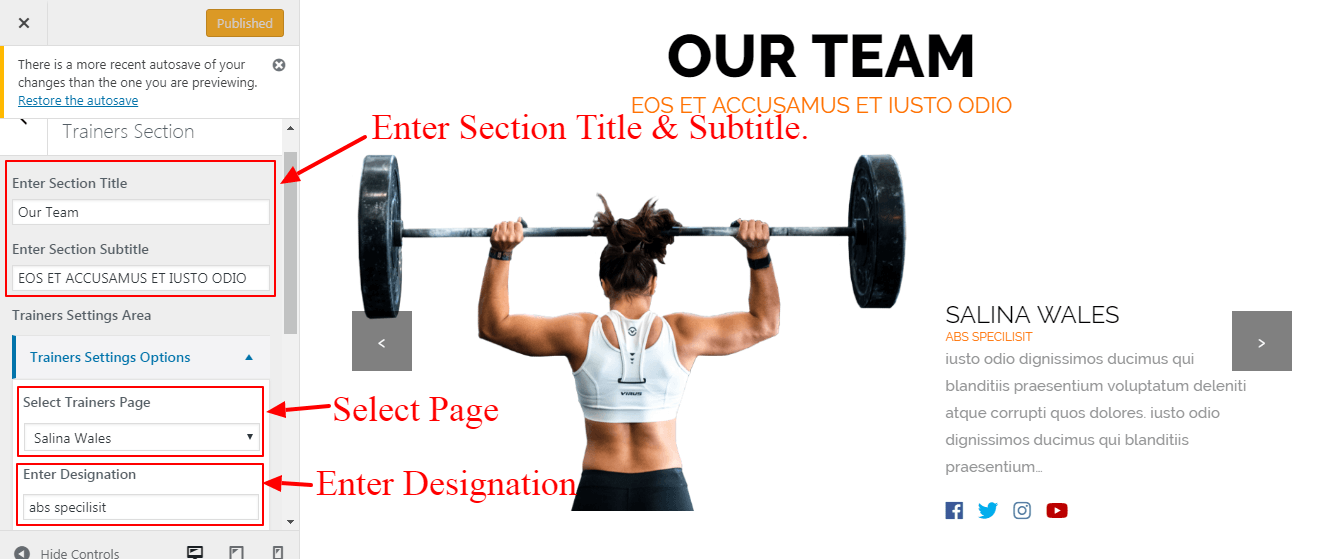
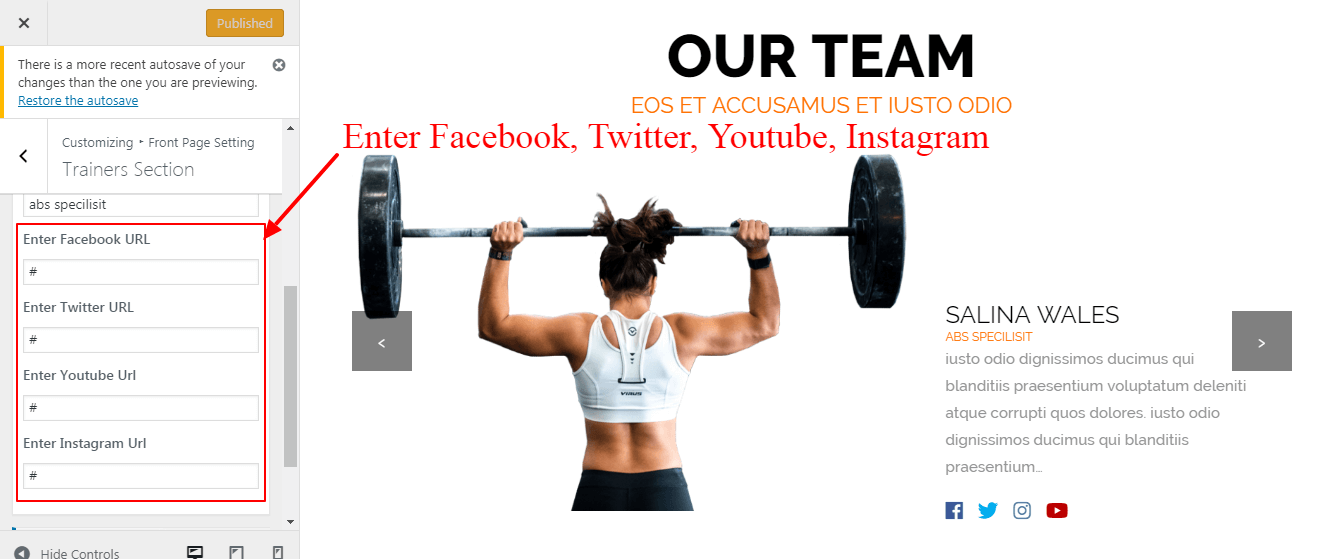
Frontpage Setting > Trainers Section
-
Enter Section Title.
-
Enter Section Subtitle.
-
Select Featured Image.
-
Enter Designation.
-
Enter Facebook URL.
-
Enter Twitter URL.
-
Enter Youtube URL.
-
Enter Instagram URL.
-
Publish.
About Page Template Setting
-
Log into your WordPress site and opens the Administration Panel.
-
Create Page With Title, Description And Featured Image.
-
Select About Template.
-
Go to Dashboard > Appearance > Customize
-
Open > About Page Template Settings.
-
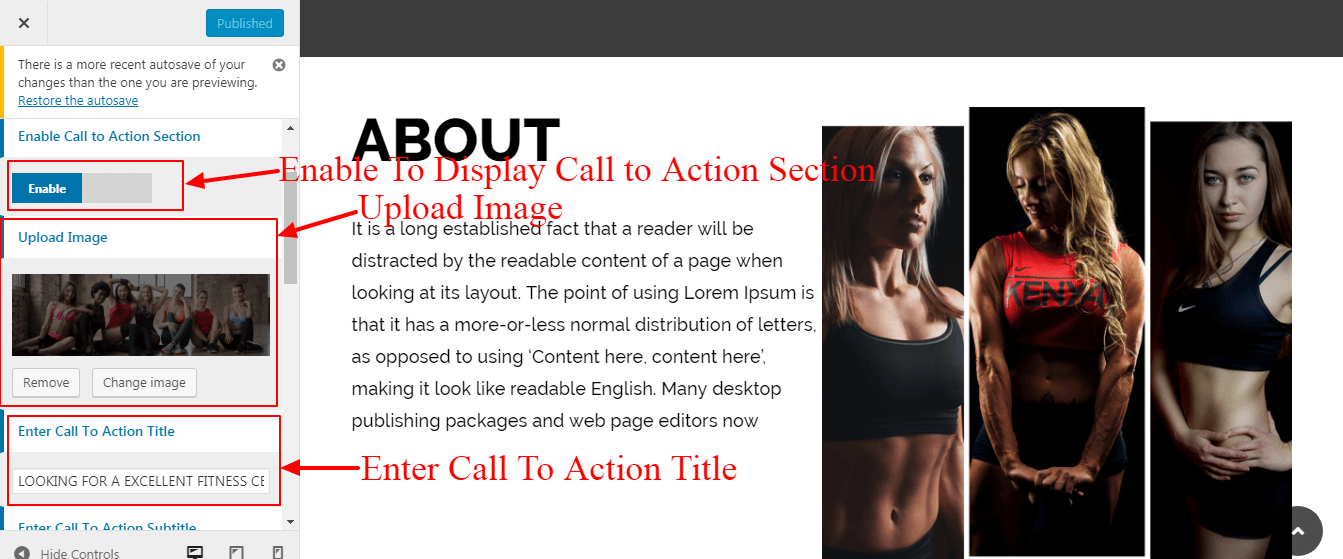
Enable Option,To Display Call To Action Section.
-
Upload Call To Ation Image.
-
Enter Call To Action Title.
-
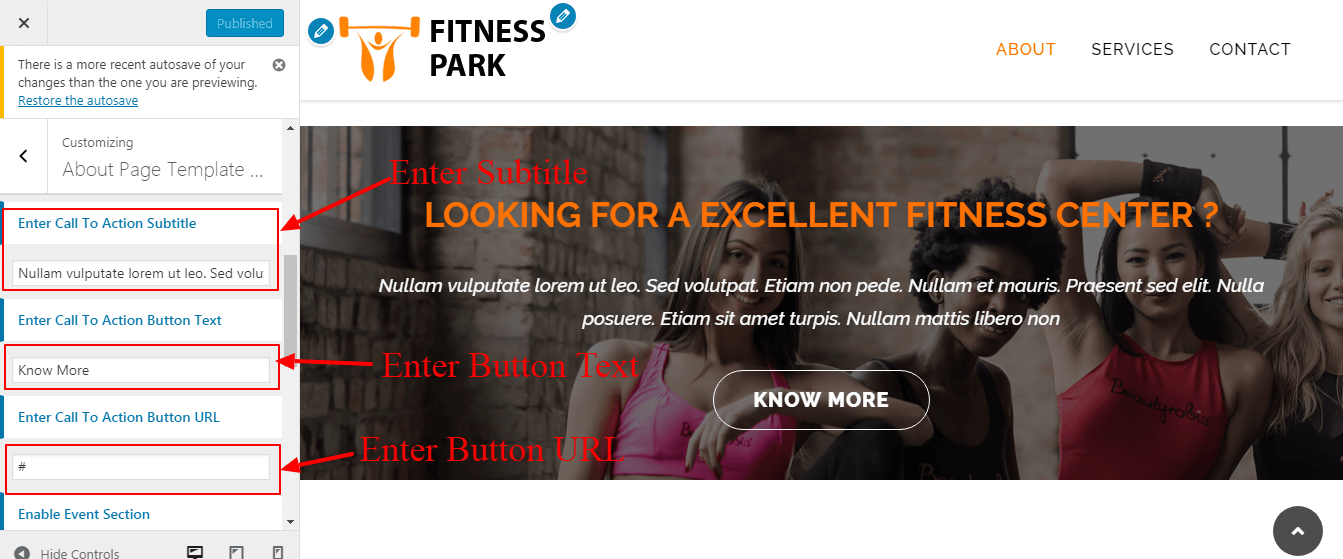
Enter Call To Action Subtitle.
-
Enter Call To Action Button Text.
-
Enter Call To Action Button URL.
-
Publish.
-
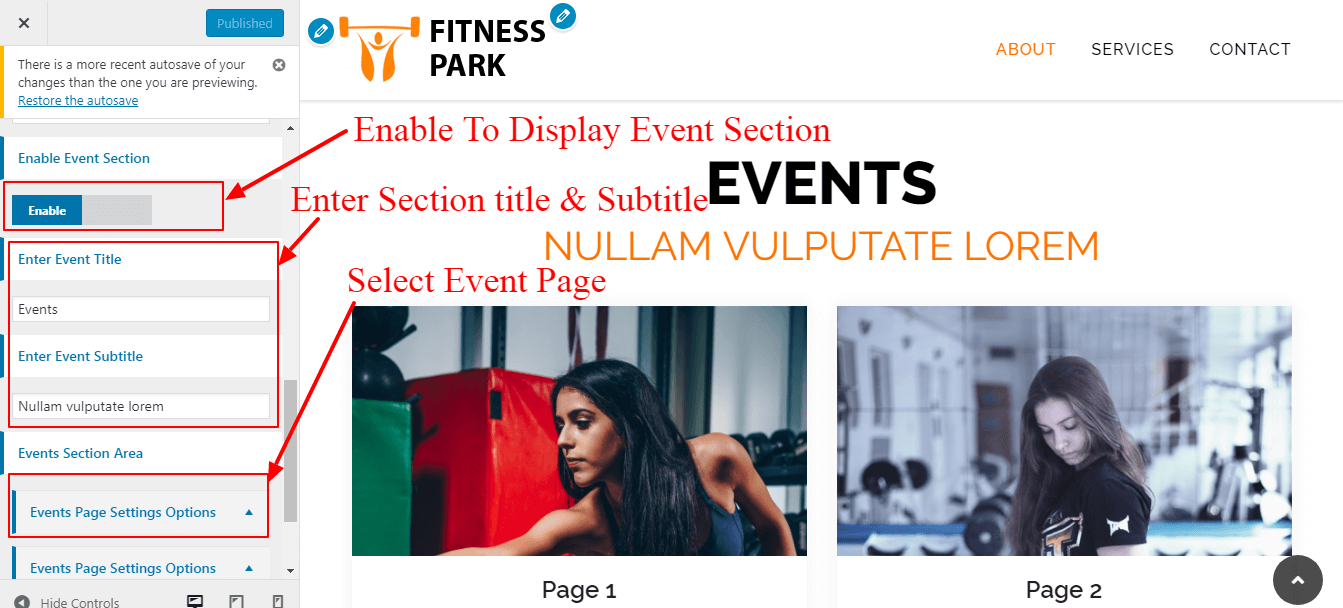
Enable To Display Event Section.
-
Enter Section Title.
-
Enter Section Subtitle.
-
Select Event Page.
-
Enter Button Text.
-
Enter Button URL.
-
Publish.
Blog Template
-
Log into your WordPress site and opens the Administration Panel.
-
Create A Page And Choose Blog Template.
-
Go to Dashboard > Appearance > Customize
-
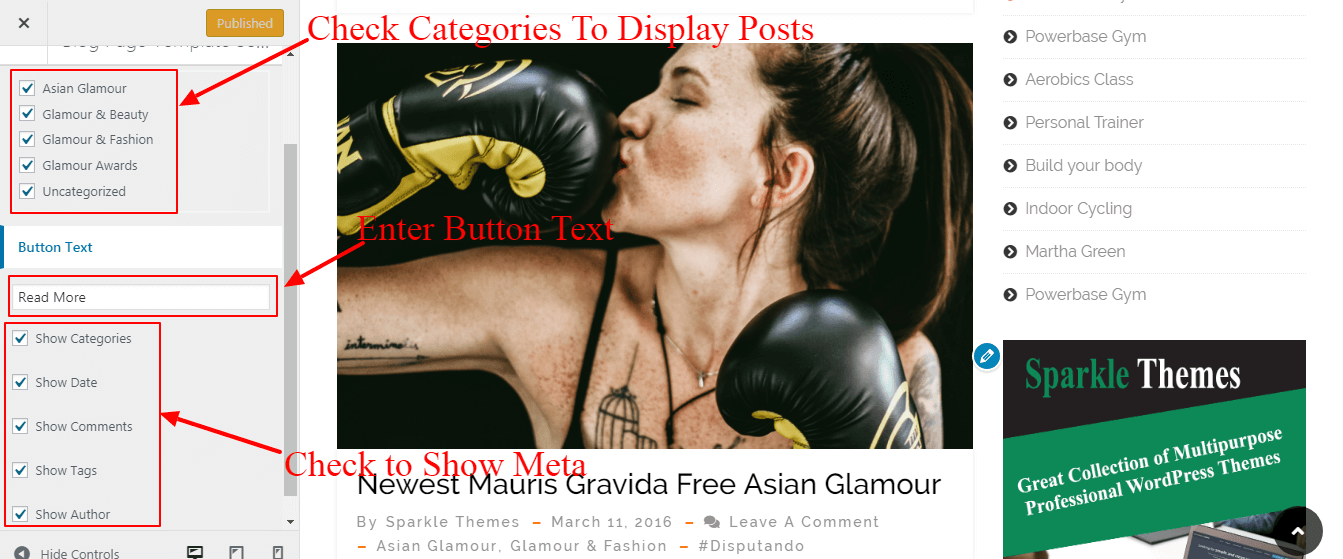
Open > Blog Page Template Setting.
-
Choose Category To Display Posts.
-
Enter Button Text.
-
Check Metas To Display on Post.
- Publish.
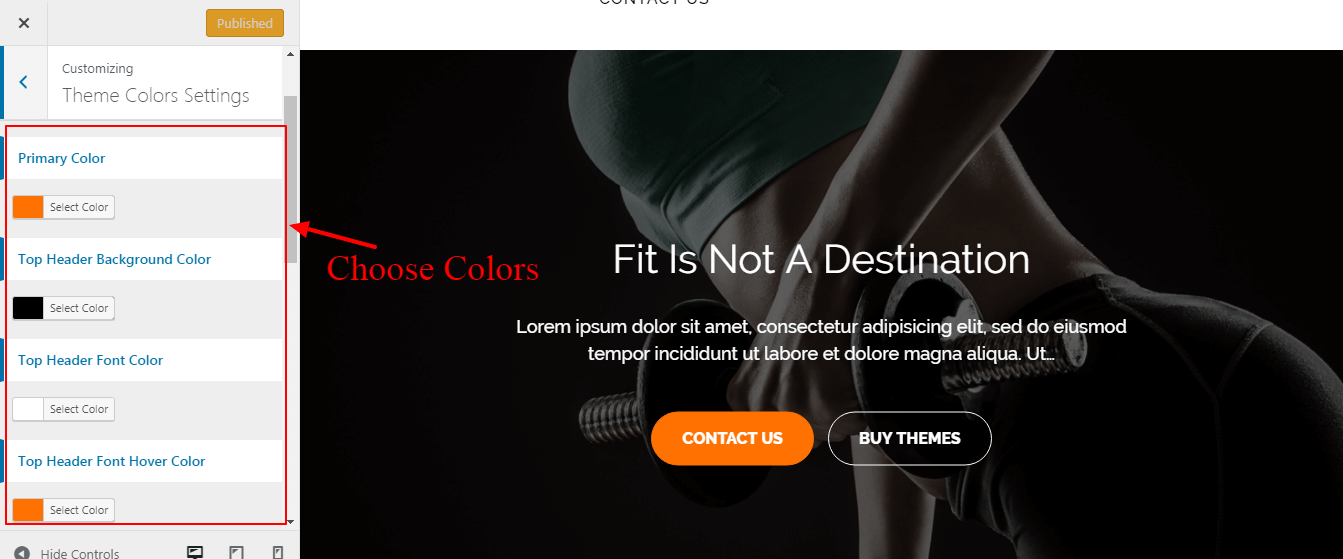
Theme Color Setting
-
Log into your WordPress site and opens the Administration Panel.
-
Go to Dashboard > Appearance > Customize
-
Theme Colors Setting.
-
Change Color Of Section As Per Your Need.
- Publish.